How to Properly Break in a New Portable Generator: A Step-by-Step Guide
A portable generator is a valuable tool for providing electrical power in a variety of settings, from household use to industrial and commercial applications. However, to ensure that your generator runs smoothly and lasts for a long time, it’s crucial to properly break it in. Breaking in a new generator involves a series of steps that help condition the engine and internal components for optimal performance. In this article, we’ll explore the steps you should follow to properly break in your new portable generator.
Why Breaking in a Generator is Important
Breaking in a new generator is essential for several reasons:
- It allows the engine components to settle and wear in evenly.
- It helps distribute oil throughout the engine, ensuring proper lubrication.
- It removes any debris or contaminants from the manufacturing process.
- It ensures the generator operates efficiently and reliably over its lifespan.
Skipping the break-in process can lead to premature wear, reduced performance, and even costly repairs.
Step 1: Read the Manual
Before using your new generator, carefully read the owner’s manual. The manual provides critical information about operating and maintaining your generator, including specific break-in instructions. Familiarize yourself with the generator’s features, controls, and safety guidelines to ensure proper use.
Key Points to Look For:
- Recommended oil type and grade.
- Break-in duration and load requirements.
- Maintenance schedule and intervals.
Step 2: Run the Generator for the First Time
When starting your generator for the first time, run it for a short period, typically 15-20 minutes. This allows the engine to warm up and distribute oil throughout its components. Running the generator briefly during the initial start helps prevent damage and prepares the engine for longer use.
Tips for the First Run:
- Start the generator in a well-ventilated area to avoid carbon monoxide buildup.
- Avoid connecting any heavy loads during the first run.
- Monitor the generator for unusual noises or vibrations.
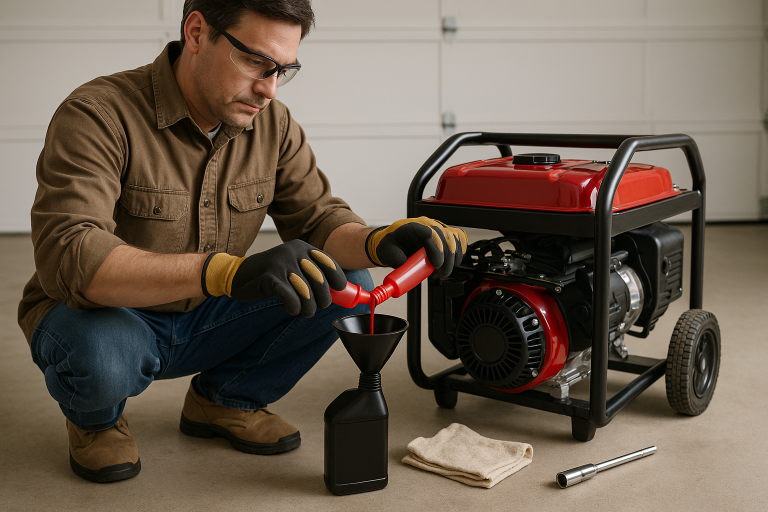
Step 3: Change the Oil
After the first few hours of use (usually 5-10 hours, as specified in the manual), change the oil. This step is crucial because it removes any metal shavings, debris, or contaminants that may have accumulated during the manufacturing process. Fresh oil ensures proper lubrication and protects the engine from wear and tear.
Oil Change Tips:
- Use the oil type and grade recommended by the manufacturer.
- Dispose of the used oil responsibly at a recycling center.
- Replace the oil filter if your generator has one.
Step 4: Vary the Load
During the break-in period, it’s important to vary the load on the generator. This means running it at different power levels, from no load to moderate load. Avoid running the generator at full load for extended periods during the break-in phase.
Why Varying the Load Matters:
- It helps the engine and generator components wear in evenly.
- It prevents overheating and excessive stress on the engine.
- It ensures the generator can handle varying power demands in the future.
Example: Run the generator at 25% load for 1-2 hours, then increase to 50% load for another 1-2 hours. Gradually work up to 75% load, but avoid 100% load until the break-in period is complete.
Step 5: Follow the Recommended Maintenance Schedule
After the break-in period, adhere to the maintenance schedule outlined in the manual. Regular maintenance is key to keeping your generator in top condition and extending its lifespan.
Common Maintenance Tasks:
- Check and replace the oil and air filter regularly.
- Inspect and clean the spark plug.
- Clean or replace the fuel filter as needed.
- Inspect the fuel lines and connections for leaks or damage.
Step 6: Use the Generator Regularly
To keep your generator in good working condition, use it regularly. If the generator will be unused for an extended period, take steps to store it properly.
Storage Tips:
- Drain the fuel tank and carburetor to prevent stale fuel from clogging the system.
- Store the generator in a clean, dry place to protect it from moisture and dust.
- Use a fuel stabilizer if you plan to store the generator with fuel in the tank.
Additional Tips for Breaking in a New Generator
- Never Overload the Generator: Always operate the generator within its rated capacity. Overloading can cause damage and shorten its lifespan.
- Use Fresh Fuel: Always use fresh, high-quality fuel to ensure optimal performance.
- Monitor Performance: Keep an eye on the generator’s performance during the break-in period. If you notice any issues, consult the manual or contact the manufacturer.
Conclusion
Properly breaking in a new portable generator is essential to ensure it runs smoothly and lasts for years to come. By following these steps—reading the manual, running the generator for a short period initially, changing the oil, varying the load, following the maintenance schedule, and using the generator regularly—you can maximize its performance and longevity.
Remember, a well-maintained generator is a reliable source of power during emergencies, outdoor activities, or off-grid living. Take the time to break in your generator correctly, and it will serve you well for many years.