Generator Governor Adjustment: A Step-by-Step Guide for Safe and Accurate Tuning
Generators are critical power sources during outages or in remote locations. However, consistent and reliable power output depends heavily on one key component: the governor.
A properly functioning governor ensures that the engine runs at a constant speed, which directly affects both voltage and frequency stability. If your generator experiences surging, inconsistent frequency, or unstable voltage, it may be time to adjust the governor.
In this guide, we’ll walk you through everything you need to know about generator governor adjustment, from understanding its role to step-by-step instructions for safe tuning.
Understanding the Role of the Governor
What Is a Governor?
A governor is a mechanical or electronic device designed to regulate the engine speed (RPM) by adjusting the fuel supply in response to changes in load. This helps maintain a steady output of electricity—especially important when powering sensitive electronics or appliances.
Types of Governors
- Mechanical Governors: Use flyweights and springs to control throttle position.
- Hydraulic Governors: Use fluid pressure to regulate engine speed more smoothly.
- Electronic Governors: Use sensors and microprocessors for precise RPM control—common in modern generators.
How the Governor Affects Generator Output
The generator’s engine must run at a constant RPM to produce stable electrical output:
- At 3600 RPM, a standard single-phase generator produces 60Hz AC power
- At 3000 RPM, it produces 50Hz AC power
If the governor fails to maintain this speed under varying loads, the result can be:
- Unstable voltage
- Frequency drift
- Damage to connected devices
Signs That Your Governor Needs Adjustment
Here are common symptoms indicating a misadjusted or failing governor:
- Engine surging or “hunting” (fluctuating RPM)
- Inconsistent voltage or frequency readings
- Power output drops significantly under load
- Unusual engine noise or vibration
Tools and Safety Equipment Needed
Before starting any adjustments, gather the necessary tools and safety gear.
Essential Tools
- Screwdrivers (flathead and Phillips)
- Wrenches and pliers
- Digital tachometer (to measure RPM)
- Multimeter (optional, for checking output frequency)
- Adjustable wrench for linkage adjustments
- Governor adjustment kit (if required)
Safety Gear
- Insulated gloves
- Safety glasses
- Ear protection (generators can be loud)
- Non-conductive footwear
Additional Items
- Owner’s manual or service manual for your specific generator model
- Clean, well-lit workspace
- Stable ground and proper ventilation
Safety Precautions Before Adjustment
Working with running engines and electrical systems poses risks. Follow these safety guidelines carefully:
- Turn off all connected loads before starting.
- Ensure the generator is cool to the touch before working on it.
- Avoid adjustments in wet or damp environments.
- Keep loose clothing, jewelry, and long hair tied back.
- Never work near moving parts while the generator is running.
- Disconnect the battery if working on electric-start models to prevent accidental startup.
Step-by-Step Governor Adjustment Process
Step 1: Prepare the Generator
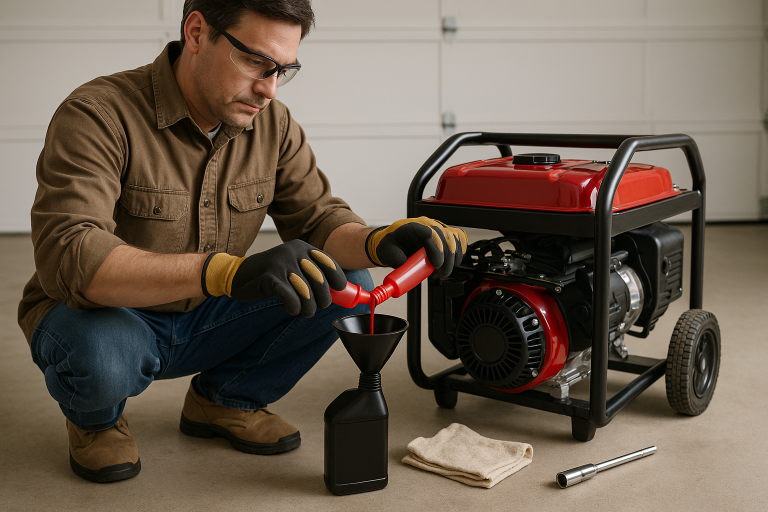
- Place the generator on a level, dry surface.
- Fill with fresh fuel and oil.
- Start the generator and let it warm up for 5–10 minutes to reach operating temperature.
Step 2: Measure Current RPM
Use a digital tachometer to check the current engine speed:
- Shine the laser pointer or contact the spinning shaft as instructed by the device.
- Compare the reading to the manufacturer’s specifications:
- 3600 RPM = 60Hz
- 3000 RPM = 50Hz
Note: If RPM fluctuates widely or doesn’t match the expected value, the governor likely needs adjustment.
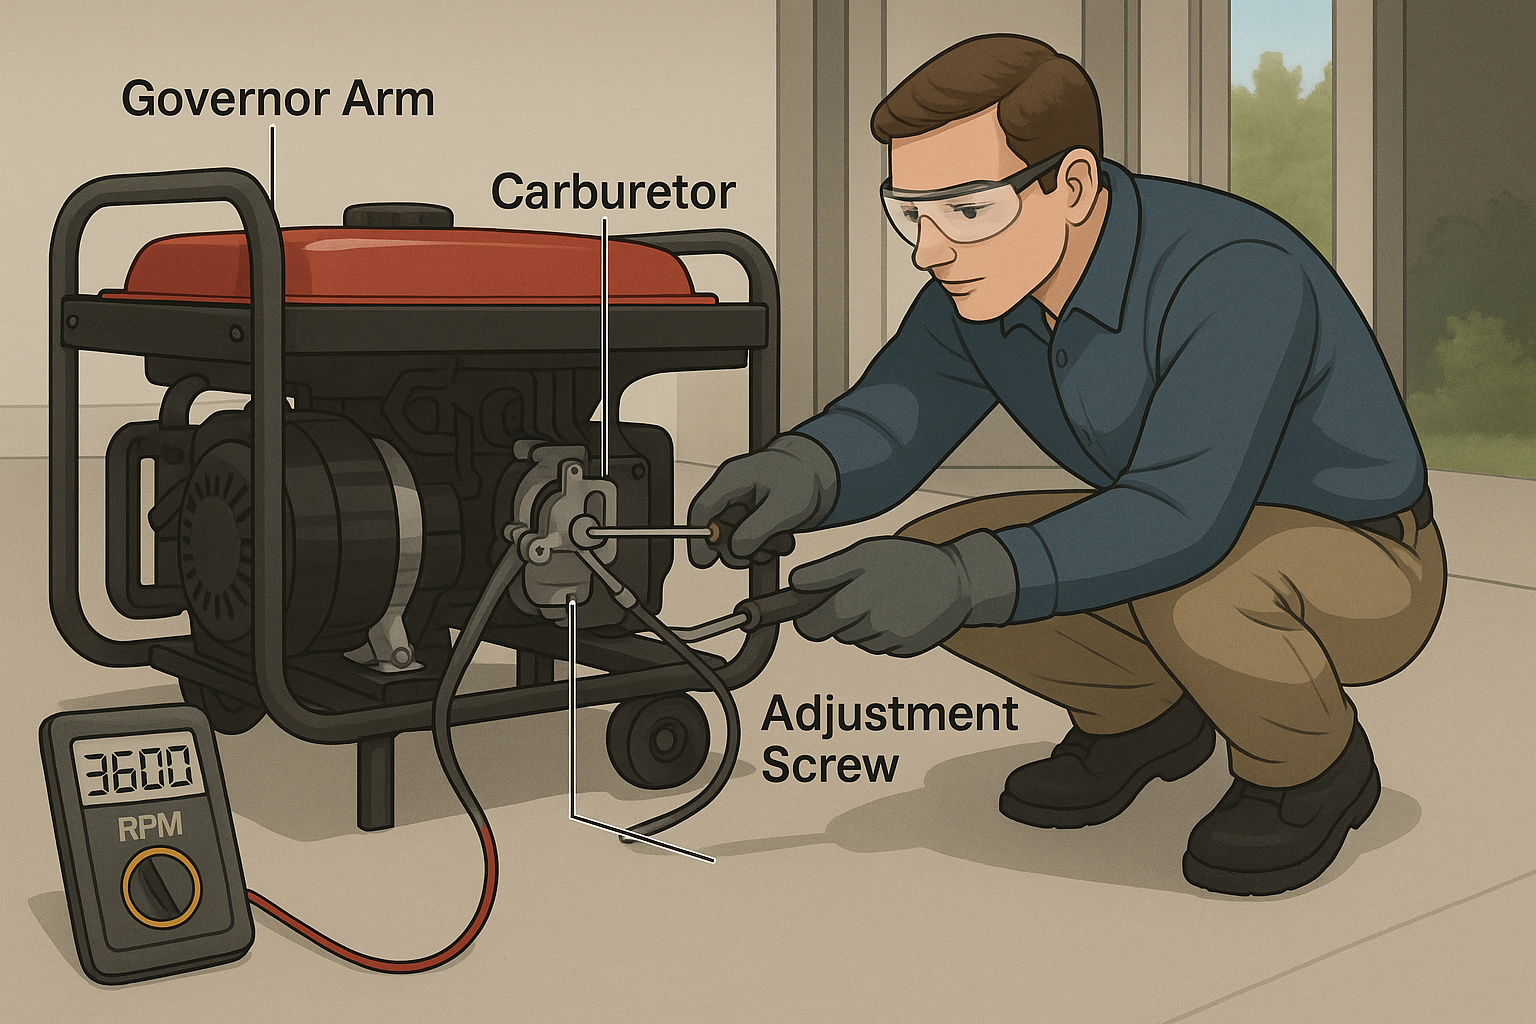
Step 3: Locate the Governor Mechanism
Most small portable generators have a visible governor arm connected to the carburetor. It typically looks like a lever with a spring attached.
Refer to your owner’s manual to locate:
- The governor arm
- The linkage connecting it to the throttle
- The adjustment screw or nut
Step 4: Adjust the Governor Arm
This step varies slightly depending on your generator type, but the general process is as follows:
- Loosen the lock nut or set screw securing the governor arm.
- Gently move the arm toward the carburetor to increase RPM, or away from it to decrease RPM.
- Observe the tachometer and adjust until the desired RPM is achieved.
- Once correct, tighten the lock nut securely.
Tip: Make small adjustments and test after each change.
Step 5: Fine-Tune and Test Under Load
Apply a light load (e.g., a space heater or light bulb) and observe how the engine responds:
- RPM should remain relatively stable
- Voltage and frequency should stay within acceptable range
Make further minor adjustments if needed.
Step 6: Recheck and Confirm Stability
After final adjustments:
- Monitor RPM, voltage, and frequency over several minutes
- Ensure the engine maintains speed under changing loads
- Record final readings for future reference
Troubleshooting Common Governor Issues
| Issue | Possible Cause | Solution |
|---|---|---|
| Engine surging/hunting | Loose linkage, worn components | Tighten connections or replace parts |
| RPM too high/low | Incorrect spring tension | Adjust governor arm or spring |
| Frequency instability | Improper synchronization with engine speed | Check RPM and re-adjust governor |
| No response to adjustment | Stuck linkage, internal wear | Lubricate or replace damaged parts |
If issues persist despite adjustments, consider consulting a professional technician.
Maintenance Tips After Adjustment
Regular maintenance helps keep your governor—and your generator—performing optimally.
- Inspect the governor linkage monthly for wear or looseness
- Lubricate moving parts as recommended in the owner’s manual
- Check RPM every few months or after heavy use
- Replace worn or damaged governor components promptly
When to Call a Professional
While many generator governors can be adjusted at home, some situations call for expert help:
- Industrial or commercial-grade generators
- Electronic or computer-controlled governors
- Persistent issues despite multiple adjustments
- Unusual noises, vibrations, or smoke during operation
If you’re unsure or uncomfortable performing the adjustment yourself, always consult a qualified generator technician.
Conclusion
Properly adjusting your generator’s governor is essential for maintaining stable power output and protecting your equipment. By following this step-by-step guide, you can ensure your generator delivers consistent performance—even under varying loads.
Remember:
- Always prioritize safety
- Use the right tools
- Understand what the readings mean
- Perform regular checks and maintenance
With a little knowledge and care, your generator will continue to provide reliable backup power when you need it most.
Frequently Asked Questions (FAQs)
Q: Can I adjust the governor on any type of generator?
A: Most mechanical and semi-mechanical governors can be adjusted manually. However, newer electronic or digital governors often require specialized software or tools.
Q: What happens if the governor isn’t adjusted correctly?
A: Incorrect governor settings can cause unstable engine speed, leading to erratic voltage and frequency, which may damage connected appliances.
Q: How often should I check and adjust the governor?
A: Every 6–12 months, or whenever you notice performance issues like surging or unstable output.
Q: Is it safe to adjust the governor without professional help?
A: Yes, for basic mechanical governors. Just follow safety precautions and refer to your owner’s manual.